Whether you’re backpacking, hiking, or simply commuting — comfort is key when it comes to finding the right pack. Hours of comfort over kilometres of terrain should be a given, and after almost 50 years of designing and manufacturing packs for all walks of life, we know what it takes to provide the support you want and the fit you need. Getting that all important fit is actually a straightforward process, and there’s one measurement you need to get started.
Find your back length
Regardless of brand, back length is the key indicator of size amongst larger backpacking and hiking packs. Some might say ‘effective back length’ or ‘torso length’, but they essentially mean the same thing.
This is because the harnesses of these packs are designed so that their loads are carried by your hips and legs. These muscles are far stronger than your upper back and shoulders. So, by getting your back length correct, you’ll have a pack that sits between the base of your spine and the bottom of your neck without any undue stress on your upper body.
Here’s how to find your Macpac back length:
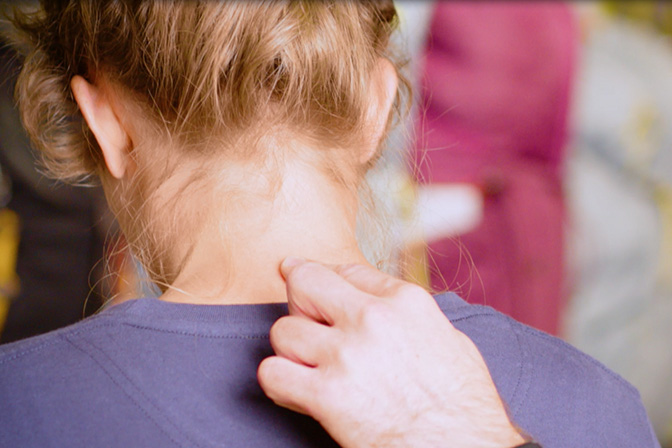
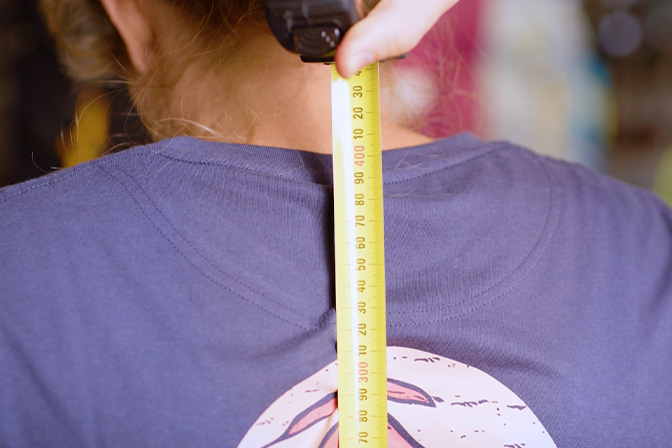
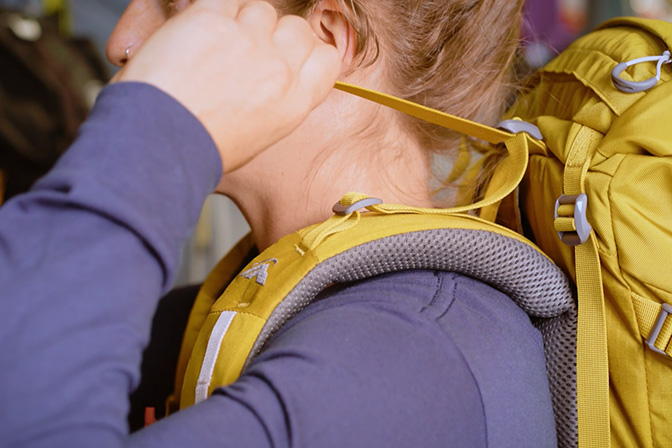
Start by locating your C7 cervical vertebra. It’s easiest to find it by looking at the ground and working down your neck — it's the highest vertebra you can feel protruding near its base. There’s no need to press hard because you should feel it easily. This point is usually a bit higher than your shoulders.
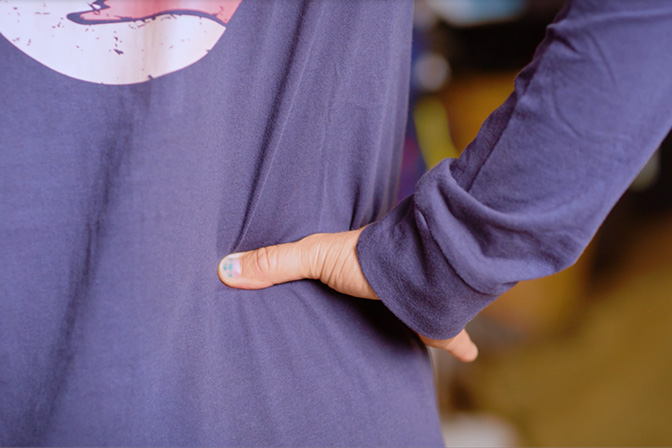
Next, find your iliac crest. It’s the highest point on the top of your hip bone, and you can find it by gently pressing your waist with your thumb and forefinger. Once you’ve located it, measure vertically from your C7 to the highest side point of your iliac crest to find your Macpac back length.
Once you’ve located it, measure vertically from your C7 to the highest side point of your iliac crest to find your Macpac back length.

Here's a handy chart of Macpac harness sizes
If you’re near the bottom of one range, and especially if you’re of light build, consider trying on the next size down. The opposite goes for anyone of a solid build. If you’re near the top of a size range — or you prefer to wear your hip belt lower — take a look at the next size up.
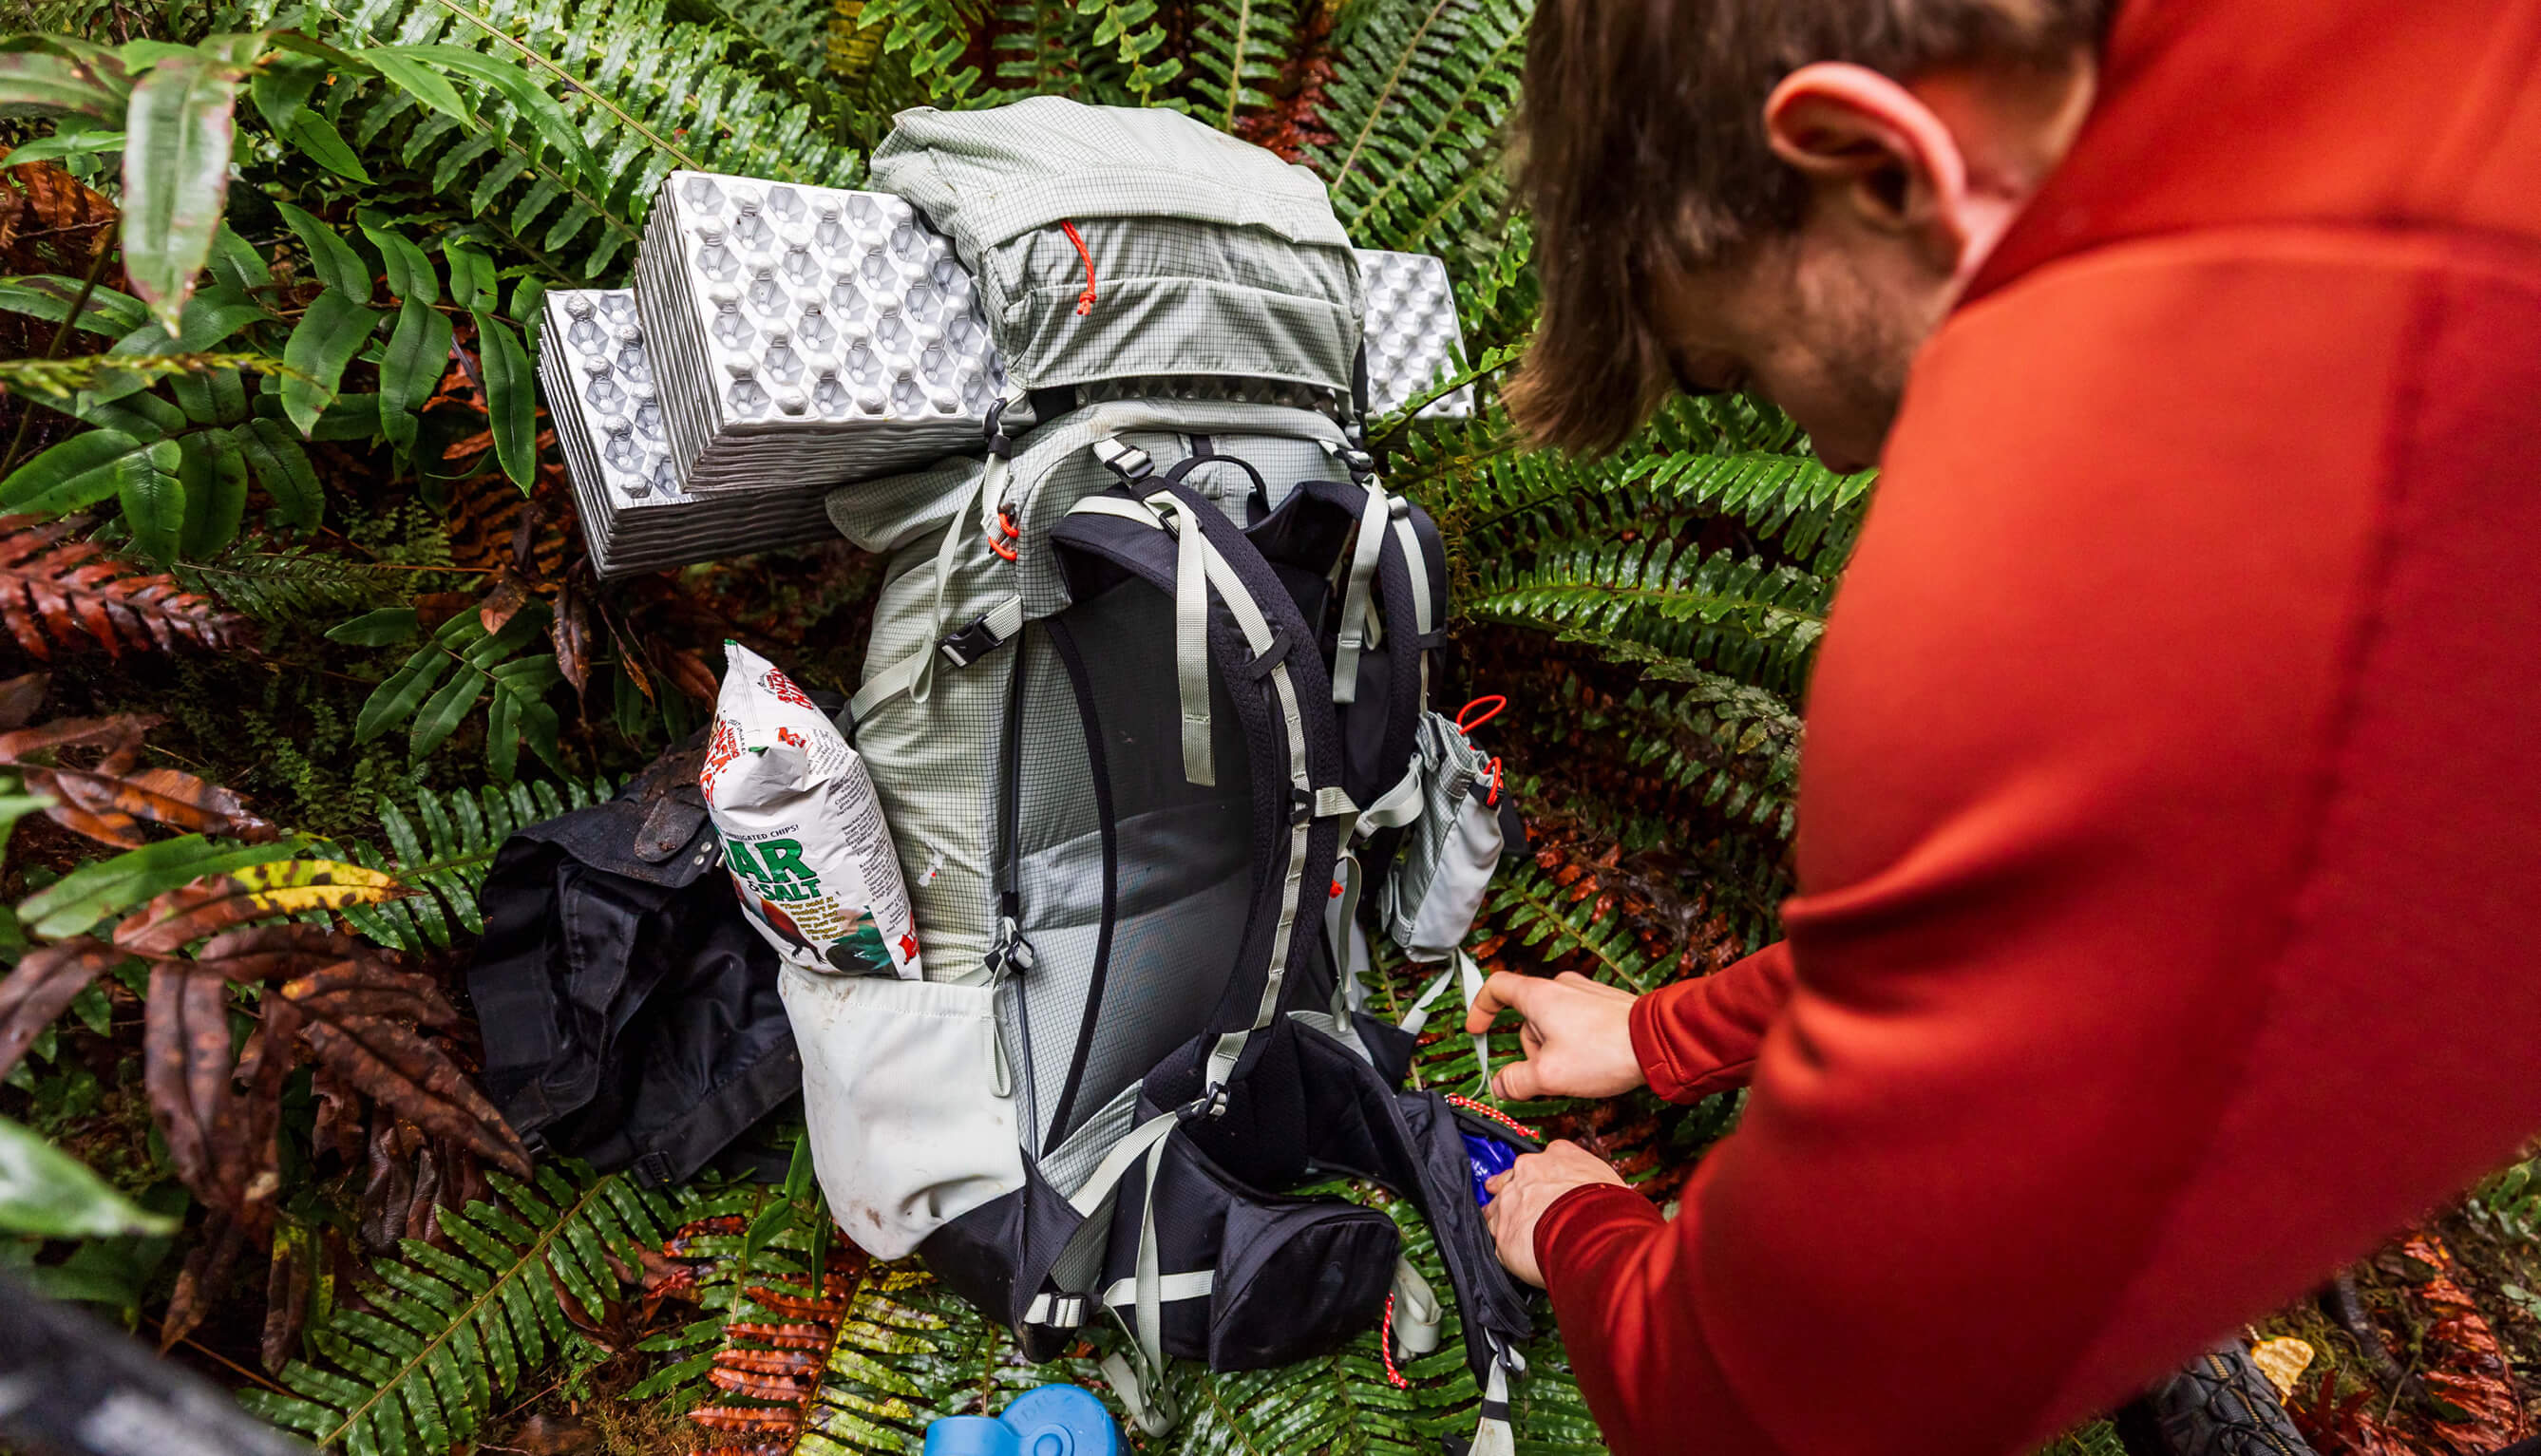
How to fit your hiking backpack
With an understanding of which size you are comes the process of making your pack fit perfectly. You’re welcome to head into any Macpac store for a free fitting, but here’s how you can do it from home. Start by packing around 6–8kg of weight so you can start to feel how the pack will support you in the wild. A sleeping bag and some clothes, or a couple of bags of flour, should do the trick. Then make sure you’ve got a mirror you can stand side-on to, or a friend who can check your fit after each step.
1. Back length
We’ve discussed its importance already, and if your harness lets you adjust the length of the back then now’s the time to have a go. Our harnesses designed to carry the greatest loads — the Liberator™, Liberator™ FreeLoad, and the AirFlo™ Flexi-Fit™ — are all adjustable.
By loosening the webbing straps at the top of the internal compartment (AirFlo™ packs) or at the top of the harness on the back panel (Liberator™ harnesses) you can move the shoulder straps up or down to tailor the pack’s fit to your back length. This avoids a situation where your hip belt sits too high or too low.
For fixed length Macpac packs, there’s nothing to worry about as long as your back length is within the ranges listed above. The harnesses of these packs still provide efficient load carry, and it’s possible to get a perfect fit from the other straps at your disposal.
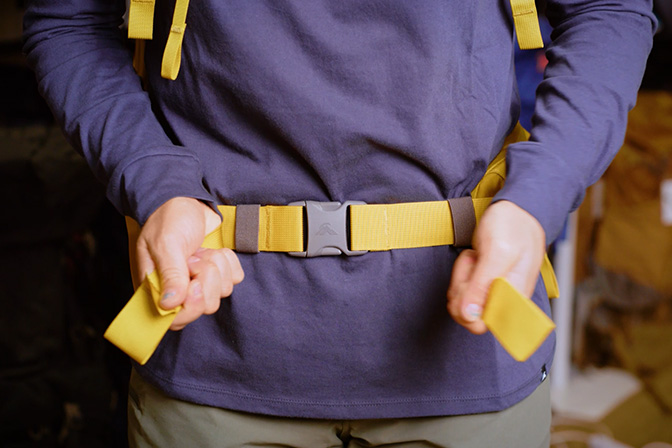
2. Hip belt
When it comes to comfort over long distances, your hip belt is your best friend. It should be soft to touch, firm around your waist, and without any pinch points in between.
To fit yours correctly, start by loosening all of the straps a little — enough so that you can put the pack on and move the belt so that it hugs the top of your iliac crest. If the base of the pack is sitting lower across your backside, check your back length again and adjust the height of the shoulder straps if you’re having to cinch them quite tight to get the right length.
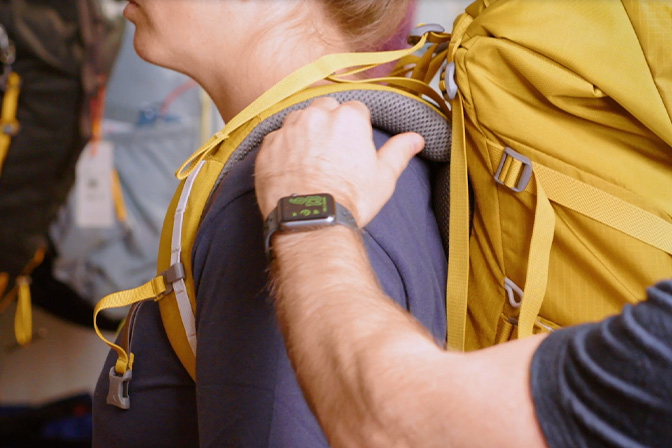
3. Shoulder straps
Next on the list are your shoulder straps, and what you’re looking for is a nice curve that follows the contour of your shoulder. Pull down on the straps so that you create a snug fit, but take care that the straps aren’t carrying much weight. Remember, it’s your hip belt that supports the bulk of the load.
The point where each strap attaches to your pack should be sitting around the top of shoulder blades at this point. If not, take a look at whether your hip belt is at the right height, or adjust your back length if necessary.
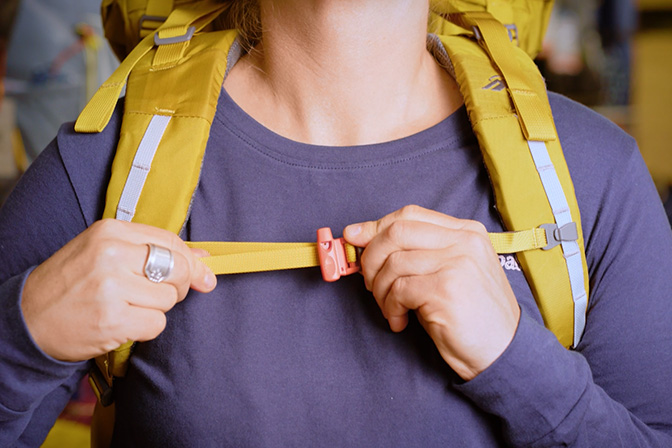
4. Sternum strap
This strap sits across your chest, and its purpose is to keep your shoulders from feeling like they’re being pulled back. Where it sits is a matter of preference, but around 3cm below your collarbone is a great place to start.
The aim isn’t to tighten too much. There should be some tension to keep everything secure but your arms should be able to move freely. Your shoulders shouldn’t feel like they’re being pulled inwards either.
5. Load lifters
The last straps to adjust are your load lifters. These straps pull the top of your pack towards your shoulders, helping to prevent you from feeling unbalanced.
Pull the loose ends down towards your chest to tighten them so that they angle back to the top of your pack at about 45°. Take care not to over tighten them, and make sure there aren’t any gaps between the tops of your shoulders and the shoulder straps.
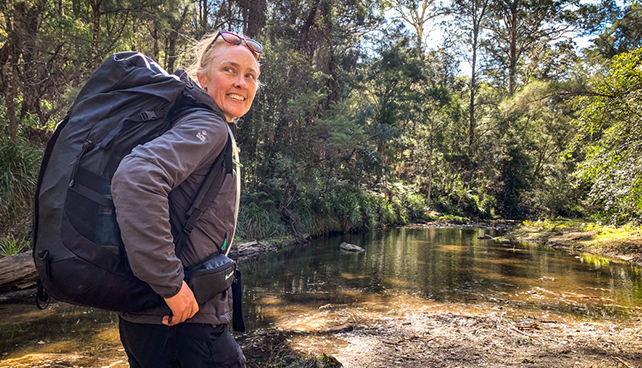
How to fit a travel backpack
The same principles apply when it comes to fitting a backpacking pack. However, when you’re heading off for potentially months on end it’s likely you’re going to carry (or try to carry) more than you’d take hiking. With this in mind, it’s even more important to get your hip belt dialled in from the start. It will make standing at airports and train stations easier, and your shoulders will love you for it after hours in transit. Here are a few of our popular travel backpack options:

Macpac Orient Express 65L Travel Backpack
Our Price
NZ$399.99MEMBERS PRICE
20% OFFCLEARANCE
20% OFFSALE
20% OFF
Macpac Genesis AzTec® 85L Travel Backpack
Our Price
NZ$489.99MEMBERS PRICE
30% OFFCLEARANCE
30% OFFSALE
30% OFF
Macpac Gemini AzTec® 75L Travel Backpack
Our Price
NZ$419.99MEMBERS PRICE
30% OFFCLEARANCE
30% OFFSALE
30% OFFHow to fit an everyday backpack
Your around-town daypack should be an uncomplicated setup, and if all it’s got is two shoulder straps then it’s purely a matter of preference. Some people like theirs higher, others lower. What’s important is that nothing’s pulling or swinging unnecessarily. If you’ve got a sternum strap on your backpack, its job is to ensure the other two straps aren’t sliding off the tops of your shoulders.

How to adjust your pack on the trail
Muscles fatigue over time, and as comfortable as they are, even the best harnesses require fine-tuning so you can keep going.
After 20 minutes of walking around the house you should notice any obvious discomfort as well. But when you’re out on the trail, here’s a few of the most common things we’ve come across:
- If you’re feeling a pinch on the front of your hip bones, try adjusting the position of the hip belt. They do a lot of the work when it comes to supporting your pack, and sometimes adjusting the point of contact is all you need to do.
- Loosening the sternum strap a touch will open your chest can make it easier to broaden your shoulders
- Shortening the back length and loosening the shoulder straps can adjust where the foam sits
PRO TIP: Finding out you’ve got the wrong fit at home is a lot easier than finding out when you’re two hours into a three-day hike, and it’s absolutely possible to return your Macpac backpack within 60 days as long as it’s in an unworn condition.
If you’re ever in doubt, feel free to visit your nearest Macpac store. Our team are more than happy to help you find the right pack and get it dialled for your next adventure. Until then, happy exploring!